Load networks to Cytoscape and microbetag
Table of contents
- Load an edge list to be used with
microbetag - Load edge list coming from the
microbetagpreparation step - Load already
microbetag-annotated networks!
INPUT FILES USED IN THIS TUTORIAL
For this tutorial we will use the output network of the
microbetag_prepstep callednetwork_output.edgelistand a previously annotated network withmicrobetagcalledmicrobetag_annotated.cx
Load an edge list to be used with microbetag
In this case, you need to first load your network on Cytoscape and then import it on the MGG. We show how to do that in the Cytoscape App Tutorial.
Remember, you need always to call the column to be used as weight of the network as microbetag::weight.
Load edge list coming from the microbetag preparation step
The preparation step should have provided you with:
- the
GTDB_tax_assigned_abundance_table.tsvand/or - the
network_output.edgelistfiles.
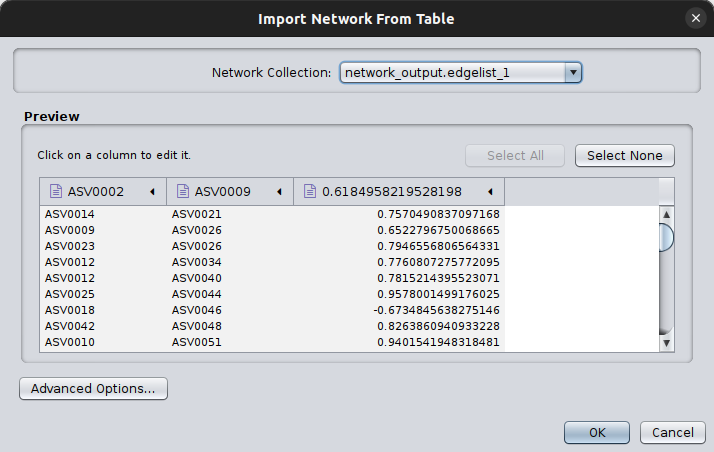
Now, we can get those two files returned and jump into Cytoscape. Open Cytoscape and then click on File > Import > Network from file and browse on the pop-up box to your network_output.edgelist file.
You will then see another pop up box like this:

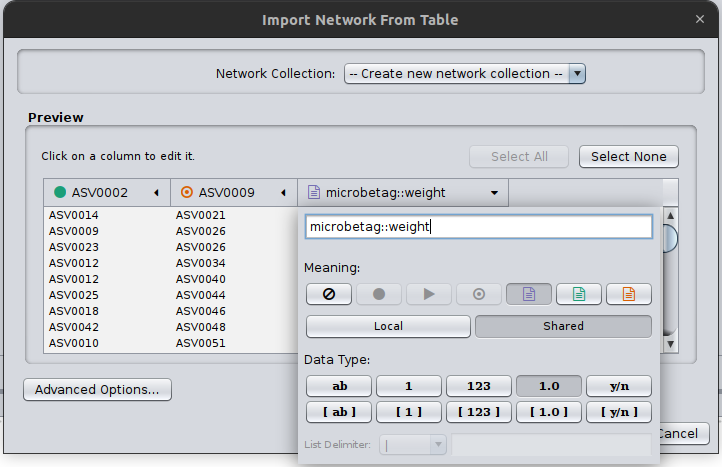
Cytoscape needs always to have a source and a target node, even in cases of undirected graphs, such as the co-occurrence networks. Therefore, click on the first two column headers and set one as the source and the other as the target by clicking on the corresponding symbols:


Finally, you need to always set the column that microbetag will consider as your weight column, in this case, we have only one column with a weight however in cases that a network is not built like that, may have several. Thus, you need to click on the corresponding column header and set it as microbetag::weight. Now microbetag is able to recognize which column to handle as the weight of your network. By clicking OK your network will be shown on Cytoscape’s main panel.

Now you are ready to import your abundance table. Go to Apps > MGG > Import Data > Import Abundance Data and browse to the GTDB_tax_assigned_abundance_table.tsv file returned from the microbetag_prep running. Load the network data to the app by clicking Apps > MGG > Import Data > Import Current Network.
The order here is important!
microbetagwill not allow you to import first your network and then your abundance table.
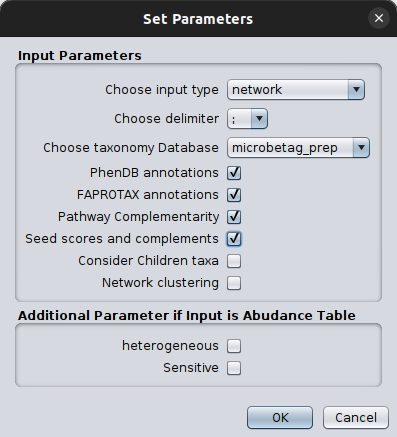
You can check on the imported date by clicking Apps > MGG > Import Data > Check Data Files. Once you make sure you have loaded what you wanted, you are ready to ask microbetag to annotate your network! Just click Apps > MGG > Get Annotated Network. Set the parameters as discussed in the Run microbetag from a co-occurrence network section.

Then, click OK. Then a Sending data to the server loading bar will appear. After a few moments, a new network will pop up on your Cytoscape main panel!
That’s it! You may now “roam” across your annotated network.
Load already microbetag-annotated networks!
If you have already a microbetag-annotated network, that will be a .cx file which you can load as any other network on Cytoscape, i.e., by clicking on File > Import > Network from file.
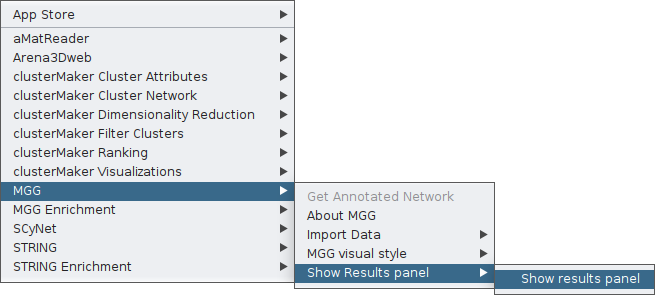
Make sure you enable the MGG style and cyPanels:

